SpringBoot自动装配

概述

​ 自动装配可简单理解为Spring自动读取配置类信息,并解析配置类中的Bean信息,然后将相关Bean初始化到IOC容器中。

1、源码剖析

1.1 查看springboot依赖

以创建的SpringBoot项目为例。我们创建了maven项目,导入了springboot的依赖,只要是springboot项目,都有这个依赖
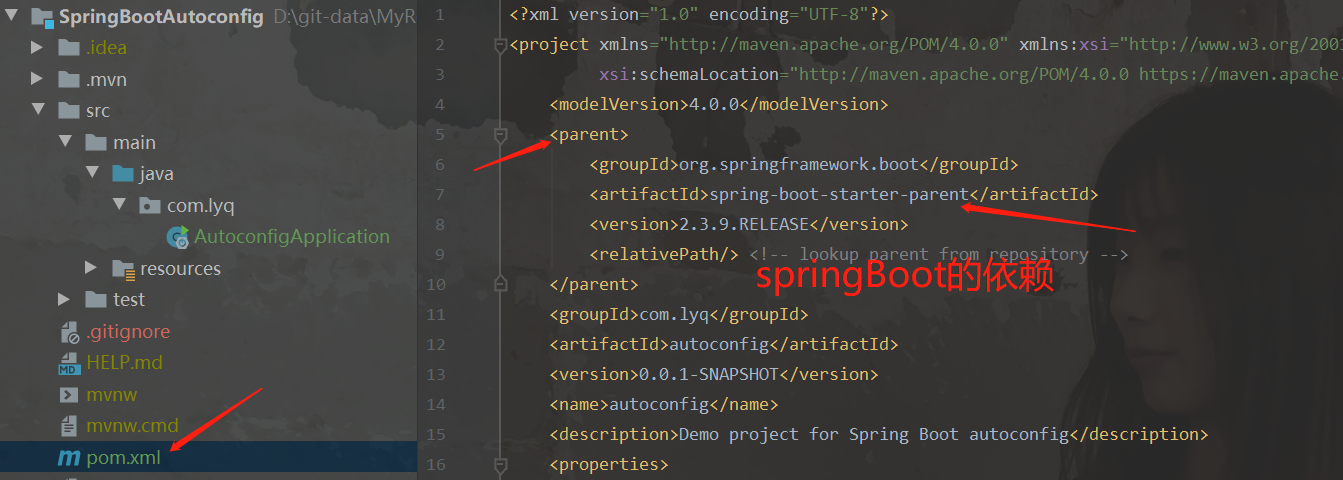
autoconfig01

进入这个依赖:

autoconfig01

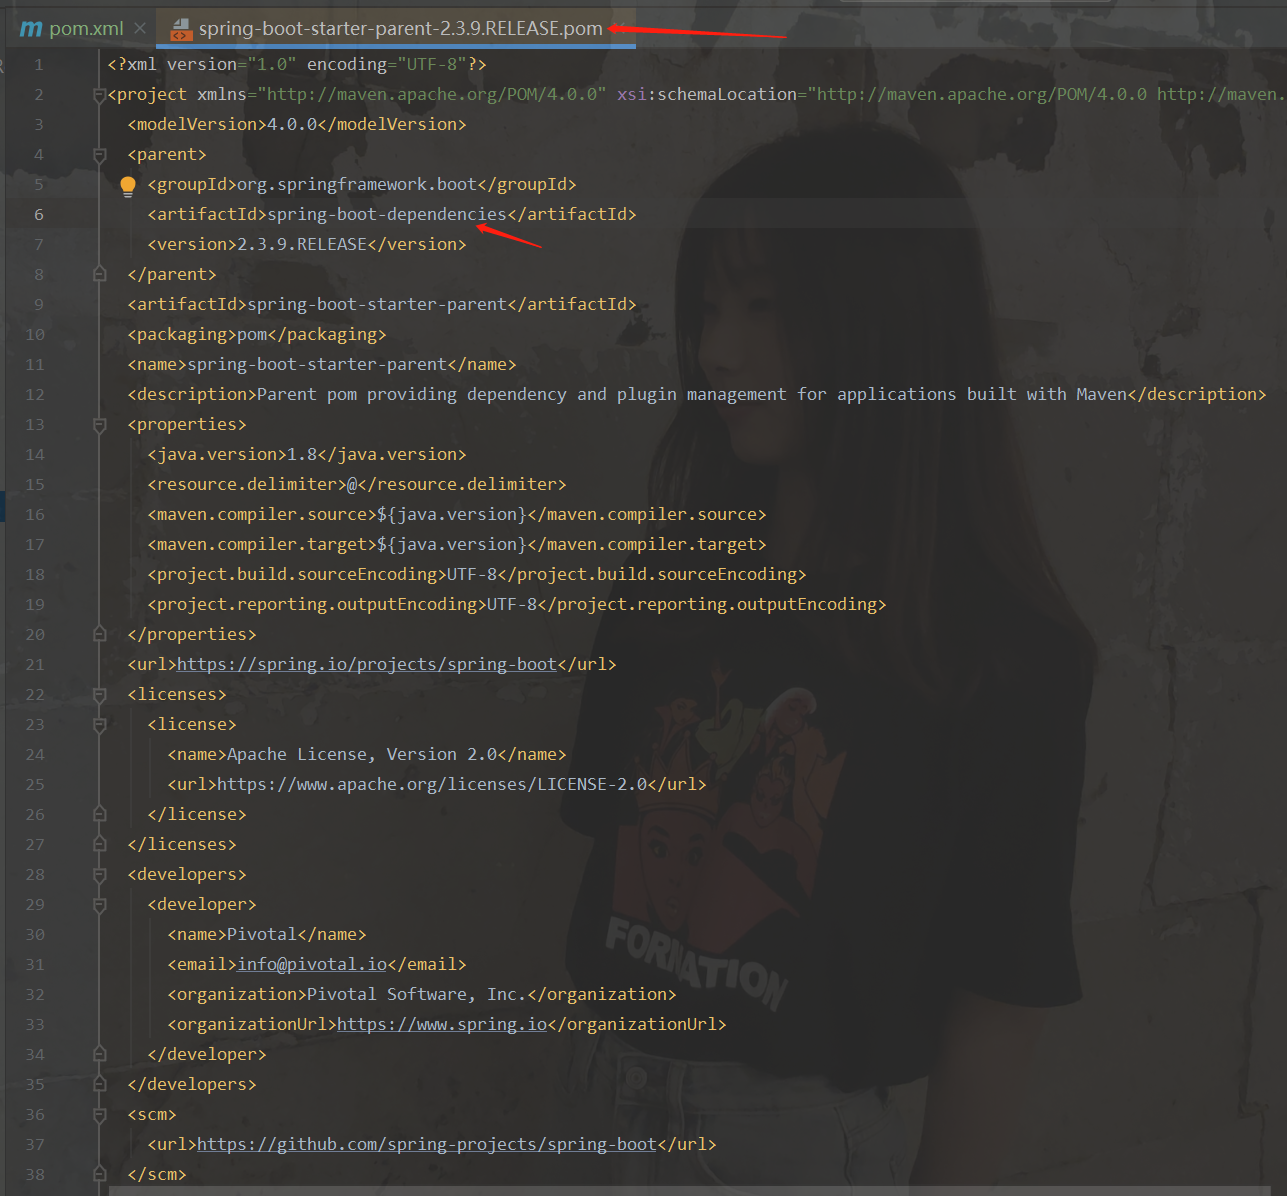
这个里面还有一个父类的依赖,我们继续的进去:

autoconfig01

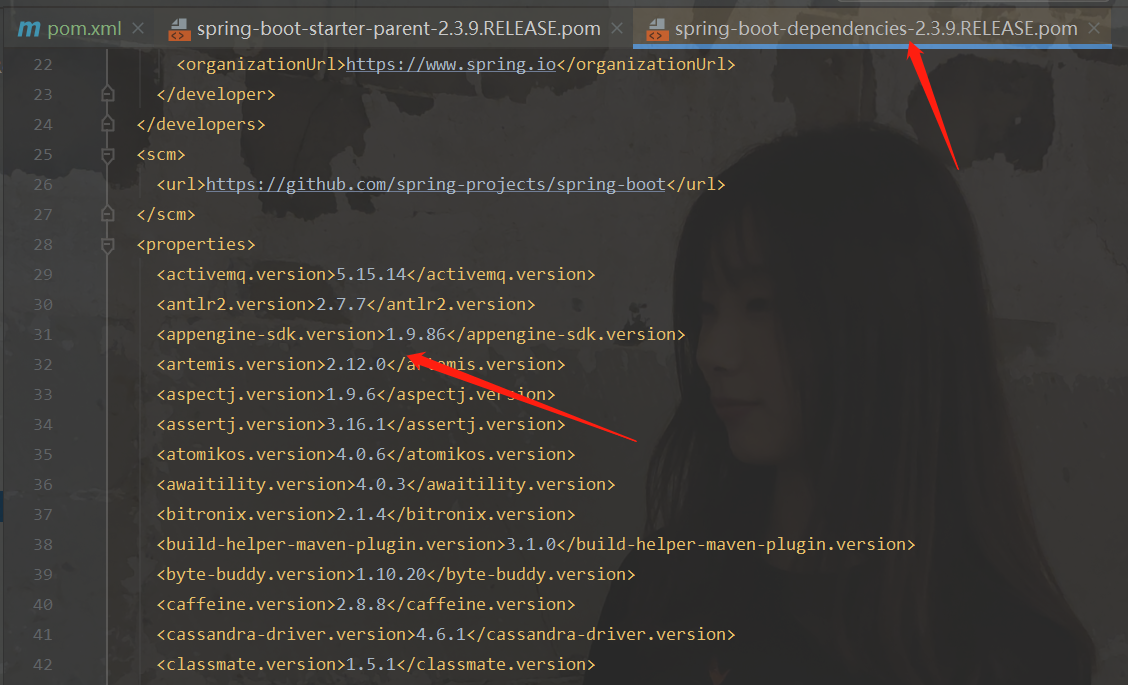
就可以看到有各种各样的jar包,意思是只要导入一个springboot的版本依赖,他就会给你导入很多的jar包,我们使用哪个,拿出来就可以了,并且不需要写版本,因为父类已经给你控制了。

spring-boot-dependencies: 核心依赖在父工程中

启动器

​ 说白了就是SpringBoot的启动场景,如spring-boot-starter-web,它会帮我们自动导入web环境所有依赖

​ springboot将所有的启动场景都变为一个个启动器

​ 我们需要使用什么功能,只需要找到对应的启动器即可
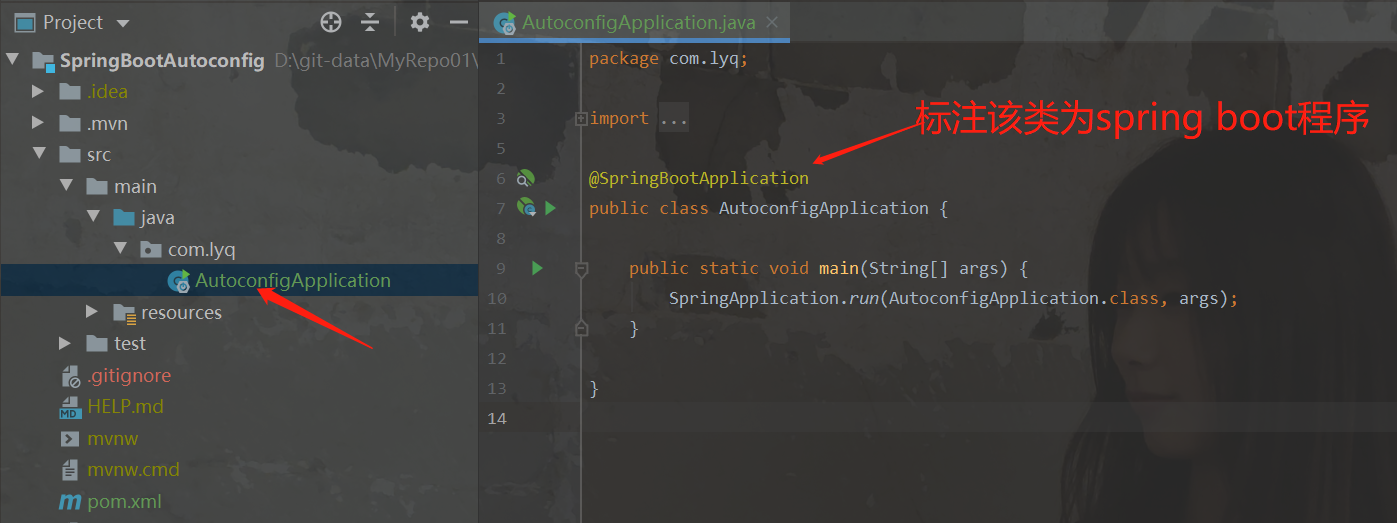
1.2 SpringBoot主程序

autoconfig01 autoconfig01

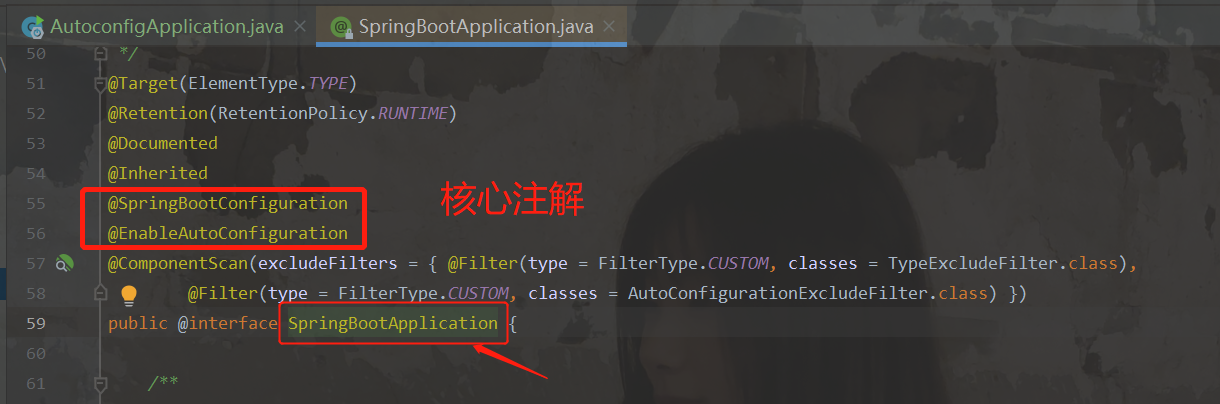
1.2.1 SpringBootConfiguration注解

1
2
3
4
5
6
7
@Target(ElementType.TYPE)
@Retention(RetentionPolicy.RUNTIME)
@Documented
@Configuration
public @interface SpringBootConfiguration {
//....
}

该注解被@Configuration注解修饰。只要一个类被这个注解修饰了,那么这个类就是一个配置类。

@Configuration注解又派生自@Component注解,@Component注解表示被修饰的类是spring的一个组件

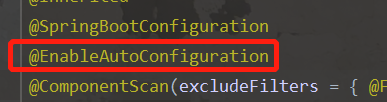
1.2.2 EnableAutoConfiguration注解

名字的意思是 自动配置,我们走进去看:

1
2
3
4
5
6
7
8
9
@Target(ElementType.TYPE)
@Retention(RetentionPolicy.RUNTIME)
@Documented
@Inherited
@AutoConfigurationPackage //自动配置包,扫描并注册我们自己写的java类到spring容器
@Import(AutoConfigurationImportSelector.class)//向spring容器中注入AutoConfigurationImportSelector对象
public @interface EnableAutoConfiguration {
//....
}

1.2.2.1 AutoConfigurationPackage 注解

1
2
3
4
5
6
7
8
@Target(ElementType.TYPE)
@Retention(RetentionPolicy.RUNTIME)
@Documented
@Inherited
@Import(AutoConfigurationPackages.Registrar.class)
public @interface AutoConfigurationPackage {
//...
}

查看AutoConfigurationPackages.Registrar.class

1
2
3
4
5
6
7
8
static class Registrar implements ImportBeanDefinitionRegistrar, DeterminableImports {

@Override
public void registerBeanDefinitions(AnnotationMetadata metadata, BeanDefinitionRegistry registry) {
register(registry, new PackageImports(metadata).getPackageNames().toArray(new String[0]));
}
//....
}

register(registry, new PackageImports(metadata).getPackageNames().toArray(new String[0]));这个代码中,其实就是完成了我们自己写的类的扫描。

new PackageImports(metadata).getPackageNames().toArray(new String[0])获取到的是指定扫描包的路径,如果未明确指定,默认为主启动类所在的包名。

1.2.2.2 分析AutoConfigurationImportSelector

这个类所做的,是将springboot提供好的自动配置装载进spring容器。

进入AutoConfigurationImportSelector查看源码。找到这个获取所有配置的方法:
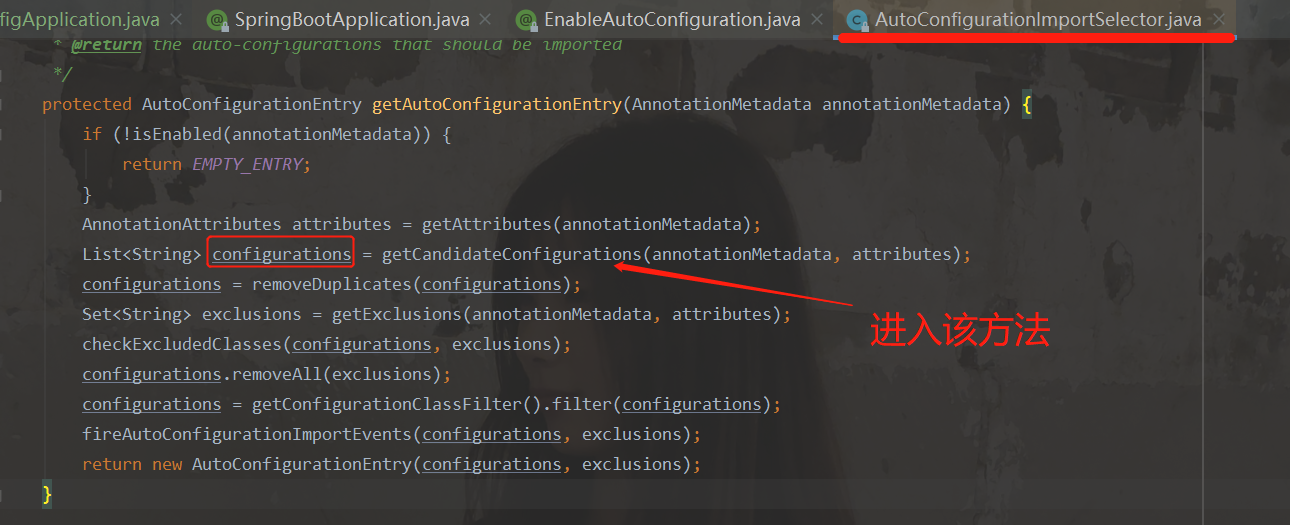
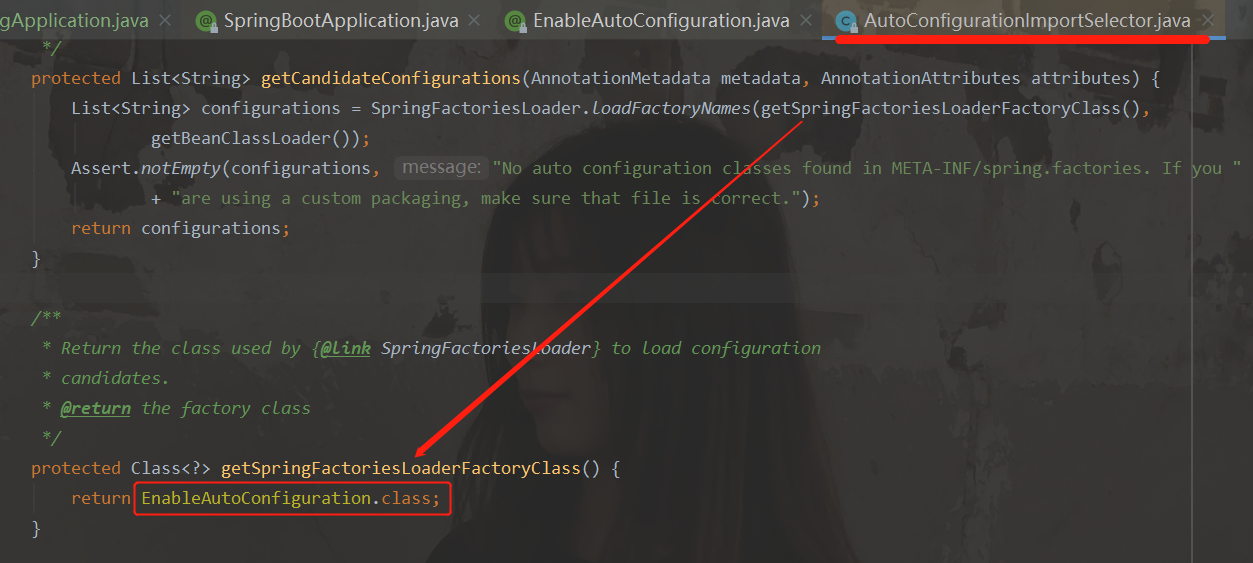
autoconfig01 autoconfig01

这个返回的东西,是在哪里见过,在这里:

autoconfig01

所以,springboot启动类的作用是:导入启动类下所有资源。

1.2.3 spring.factories

autoconfig01

​ 就是从这个红框里面的文件夹下面导入东西,如果这个文件夹不在,那么就报出这个消息,这个消息的意思是没有这个文件夹,或者这个文件夹下面没东西。那么我们看看这个文件夹下面有什么呢?

spring.factories

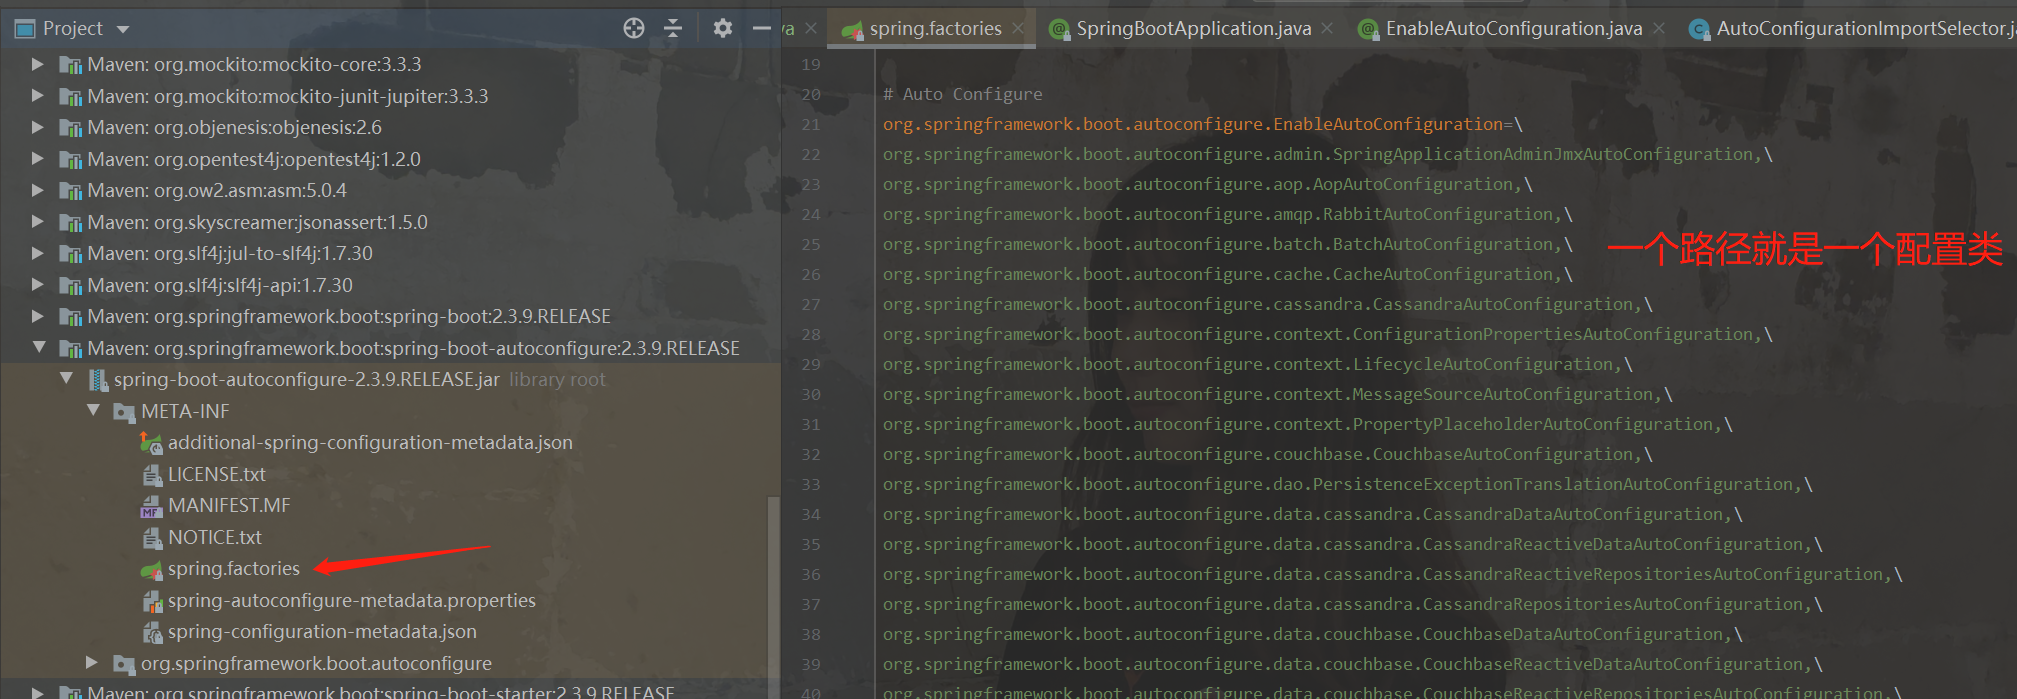
一个路径,就是一个配置类,我们可以随便进入一个路径,例如我们进入org.springframework.boot.autoconfigure.web.servlet.WebMvcAutoConfiguration:

1
2
3
4
5
6
7
8
9
10
@Configuration(proxyBeanMethods = false)
@ConditionalOnWebApplication(type = Type.SERVLET)
@ConditionalOnClass({ Servlet.class, DispatcherServlet.class, WebMvcConfigurer.class })
@ConditionalOnMissingBean(WebMvcConfigurationSupport.class)
@AutoConfigureOrder(Ordered.HIGHEST_PRECEDENCE + 10)
@AutoConfigureAfter({ DispatcherServletAutoConfiguration.class, TaskExecutionAutoConfiguration.class,
ValidationAutoConfiguration.class })
public class WebMvcAutoConfiguration {
//....
}

1.2.4 配置类是否生效

spring.factories 里面有很多的配置类的路径,对应的配置类有的却没有生效。那是由于缺少相关依赖,导致条件不足。

例如:进入org.springframework.boot.autoconfigure.amqp.RabbitAutoConfiguration

autoconfig01

看见爆红,意思是这个依赖是没有加入,也就是start启动没有加入,只有在pom里面导入对应的依赖,才会加入,这个注解就是对依赖进行判断,只有pom里面导入了,判断成功之后才会加入

2、模拟SpringBoot自动装配

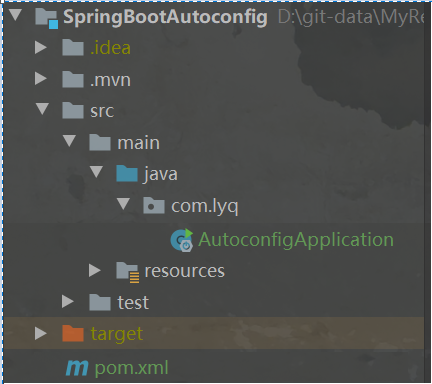
新建一个Spring Boot工程,Spring Boot版本为2.3.9.RELEASE,artifactId为autoconfig,并引入spring-boot-starter-web依赖。项目结构如下所示:

autoconfig01

2.1 模式注解

Stereotype Annotation俗称为模式注解,Spring中常见的模式注解有@Service@Repository@Controller等,它们都“派生”自@Component注解。我们都知道,凡是被@Component标注的类都会被Spring扫描并纳入到IOC容器中,那么由@Component派生的注解所标注的类也会被扫描到IOC容器中。下面我们主要通过自定义模式注解来了解@Component的“派生性”和“层次性”。

2.1.1 @Component 派生性

com.lyq下新建annotation包,然后创建一个FirstLevelService注解:

1
2
3
4
5
6
7
8
9
10
11
12
13
/**
* @FirstLevelService@Component派生出来的模式注解:
* @Component
* |__ @Service
* |___ @FirstLevelService
*/
@Target({ElementType.TYPE})
@Retention(RetentionPolicy.RUNTIME)
@Documented
@Service
public @interface FirstLevelService {
String value() default "";
}

com.lyq下新建service包,然后创建一个TestService类:

1
2
3
@FirstLevelService
public class TestService {
}

com.lyq下新建bootstrap包,然后创建一个ServiceBootStrap类,用于测试注册TestService并从IOC容器中获取它:

1
2
3
4
5
6
7
8
9
10
@ComponentScan("com.lyq.service")
public class ServcieBootStrap {
public static void main(String[] args) {
//拿到spring容器
ConfigurableApplicationContext context = new SpringApplicationBuilder(ServcieBootStrap.class).web(WebApplicationType.NONE).run(args);
TestService testService = context.getBean("testService", TestService.class);
System.out.println("FisrtService Bean:" + testService);
context.close();
}
}

运行该类的main方法,控制台输出:

1
TestService Bean:com.lyq.service.TestService@6e6f2380

2.1.2 @Component 层次性

我们在com.lyq.annotation路径下再创建一个SecondLevelService注解定义,该注解由上面的@FirstLevelService标注:

1
2
3
4
5
6
7
8
9
10
11
12
13
14
/**
* 层次性:
* @Component
* |__ @Service
* |___ @FirstLevelService
* |___ @SecondLevelService
*/
@Target({ElementType.TYPE})
@Retention(RetentionPolicy.RUNTIME)
@Documented
@FirstLevelService
public @interface SecondLevelService {
String value() default "";
}

我们将TestService上的注解换成@SecondLevelService,然后再次运行ServiceBootStrap的main方法,输出如下:

1
TestService Bean:com.lyq.service.TestService@1530c739

可见结果也是成功的。

这里有一点需要注意的是:@Component注解只包含一个value属性定义,所以其“派生”的注解也只能包含一个value属性定义。

2.2 @Enable模块驱动

@Enable模块驱动在Spring Framework 3.1后开始支持。这里的模块通俗的来说就是一些为了实现某个功能的组件的集合。通过@Enable模块驱动,我们可以开启相应的模块功能。

@Enable模块驱动可以分为“注解驱动”和“接口编程”两种实现方式,下面逐一进行演示:

2.2.1 注解驱动

2.2.1.1 案例

Spring中,基于注解驱动的示例可以查看@EnableWebMvc源码:

1
2
3
4
5
6
@Retention(RetentionPolicy.RUNTIME)
@Target({ElementType.TYPE})
@Documented
@Import({DelegatingWebMvcConfiguration.class})
public @interface EnableWebMvc {
}

该注解通过@Import导入一个配置类`DelegatingWebMvcConfiguration

基于注解驱动的@Enable模块驱动其实就是通过@Import来导入一个配置类,以此实现相应模块的组件注册,当这些组件注册到IOC容器中,这个模块对应的功能也就可以使用了。

2.2.1.2 实现

我们来定义一个基于注解驱动的@Enable模块驱动。

com.lyq下新建configuration包,然后创建一个HelloWorldConfiguration配置类:

1
2
3
4
5
6
7
@Configuration
public class HelloWorldConfiguration {
@Bean
public String hello(){
return new String("Hello word!");
}
}

com.lyq.annotation下创建一个EnableHelloWorld注解定义:

1
2
3
4
5
6
@Target({ElementType.TYPE})
@Retention(RetentionPolicy.RUNTIME)
@Documented
@Import(HelloWorldConfiguration.class)//导入刚刚创建的配置类
public @interface EnableHelloWorld {
}

着在com.lyq.bootstrap下创建一个TestEnableBootstap启动类来测试@EnableHelloWorld注解是否生效

1
2
3
4
5
6
7
8
9
10
@EnableHelloWorld
public class TestEnableBootStrap {
public static void main(String[] args) {
//拿到spring容器
ConfigurableApplicationContext context = new SpringApplicationBuilder(TestEnableBootStrap.class).web(WebApplicationType.NONE).run(args);
String hello = context.getBean("hello", String.class);
System.out.println("hello Bean:" + hello);
context.close();
}
}

运行该类的main方法,控制台输出如下:

1
hello Bean:Hello word!

2.2.2 接口编程

2.2.2.1 案例

除了使用上面这个方式外,我们还可以通过接口编程的方式来实现@Enable模块驱动。Spring中,基于接口编程方式的有@EnableCaching注解,查看其源码:

1
2
3
4
5
6
7
8
9
10
11
@Target({ElementType.TYPE})
@Retention(RetentionPolicy.RUNTIME)
@Documented
@Import({CachingConfigurationSelector.class})
public @interface EnableCaching {
boolean proxyTargetClass() default false;

AdviceMode mode() default AdviceMode.PROXY;

int order() default 2147483647;
}

EnableCaching注解通过@Import导入了CachingConfigurationSelector类,该类间接实现了**ImportSelector接口**,在 深入学习Spring组件注册 中,我们曾介绍了可以通过ImportSelector来实现组件注册。

所以通过接口编程实现@Enable模块驱动的本质是:通过**@Import来导入接口ImportSelector实现类**,该实现类里可以定义需要注册到IOC容器中的组件,以此实现相应模块对应组件的注册。

2.2.2.2 实现

com.lyq下新建selector包,然后在该路径下新建一个HelloWorldImportSelector实现ImportSelector接口:

1
2
3
4
5
6
7
public class HelloWorldImportSelector implements ImportSelector {
@Override
public String[] selectImports(AnnotationMetadata importingClassMetadata) {
return new String[]{HelloWorldConfiguration.class.getName()};
}
//....
}

接着我们修改EnableHelloWorld

1
2
3
4
5
6
7
@Target({ElementType.TYPE})
@Retention(RetentionPolicy.RUNTIME)
@Documented
//@Import(HelloWorldConfiguration.class)//注解驱动,导入一个配置类
@Import(HelloWorldImportSelector.class)//接口编程,导入接口ImportSelector实现类
public @interface EnableHelloWorld {
}

再次运行TestEnableBootstap的main方法,你会发现输出是一样的。

2.3 自动装配

2.3.1 分析

Spring Boot中的自动装配技术底层主要用到了下面这些技术:

  1. Spring 模式注解装配
  2. Spring @Enable 模块装配
  3. Spring 条件装配装(深入学习Spring组件注册中有介绍)
  4. Spring 工厂加载机制

Spring 工厂加载机制的实现类为SpringFactoriesLoader,查看其源码:

autoconfig01

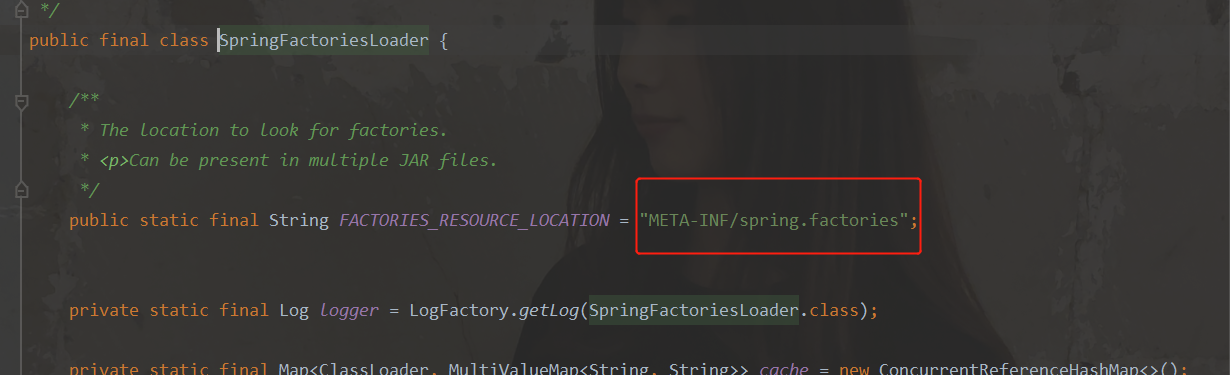
该类的方法会读取META-INF目录下的spring.factories配置文件,我们查看spring-boot-autoconfigure-2.3.9.RELEASE.jar下的该文件。

当启动类被@EnableAutoConfiguration标注后,Spring会去扫描spring.factories中配置的所有类,看是否可以纳入到IOC容器中进行管理。

比如我们查看org.springframework.boot.autoconfigure.data.redis.RedisAutoConfiguration的源码:

autoconfig01

2.3.2 实现

新建一个配置类HelloWorldAutoConfiguration

1
2
3
4
5
@Configuration
@EnableHelloWorld
@ConditionalOnProperty(name="hello_world",havingValue = "true")
public class HelloWorldAutoConfiguration {
}

然后在resources目录下新建META-INF目录,并创建spring.factories文件:

1
2
3
# Auto Configure
org.springframework.boot.autoconfigure.EnableAutoConfiguration=\
com.lyq.configuration.HelloWorldAutoConfiguration

接着在配置文件application.properties中添加helloworld=true配置:

1
hello_world=true

最后创建EnableAutoConfigurationBootstrap,测试下HelloWorldAutoConfiguration是否生效:

1
2
3
4
5
6
7
8
9
10
11
@EnableAutoConfiguration
public class EnableAutoConfigurationBootstrap {
public static void main(String[] args) {
ConfigurableApplicationContext context = new SpringApplicationBuilder(EnableAutoConfigurationBootstrap.class)
.web(WebApplicationType.NONE)
.run(args);
String hello = context.getBean("hello", String.class);
System.out.println("hello Bean: " + hello);
context.close();
}
}

运行该main方法,控制台输出如下:

1
hello Bean: Hello word!

2.3.3 回顾

  1. Spring 的工厂加载机制会自动读取META-INF目录下spring.factories文件内容;

  2. 我们在spring.factories定义了:

    1
    2
    org.springframework.boot.autoconfigure.EnableAutoConfiguration=\
    com.lyq.configuration.HelloWorldAutoConfiguration

    我们在测试类上使用了@EnableAutoConfiguration注解标注,那么HelloWorldAutoConfiguration就会被Spring扫描,看是否符合要求,如果符合则纳入到IOC容器中;

  3. HelloWorldAutoConfiguration上的@ConditionalOnProperty的注解作用为:当配置文件中配置了hello_world=true(我们确实添加了这个配置,所以符合要求)则这个类符合扫描规则;@EnableHelloWorld注解是我们前面例子中自定义的模块驱动注解,其引入了hello这个Bean,所以IOC容器中便会存在hello这个Bean了;

  4. 通过上面的步骤,我们就可以通过上下文获取到hello这个Bean了。

点击这里查看源码。